Website speed has a significant impact on the user experience. Slow page speeds quickly increase bounce rate and have a negative impact on SEO. Therefore, web developers need to consider measures to improve page display speed. One of the effective way to improve website speed is optimizing images.
Google recommends to keep the total byte size per page to less than 1.6 MB.
Aim to keep your total byte size below 1,600 KiB. This target is based on the amount of data that can be theoretically downloaded on a 3G connection while still achieving a Time to Interactive of 10 seconds or less.
– Chrome Developers
A single unoptimized high-quality image file can easily exceed several MB, which alone would exceed the recommended total byte size per page. Since image file size occupy a very large percentage of the total file size of a page, it is important to reduce file size by compressing, resizing, and selecting appropriate file formats.
Why image file sizes become too large?
There are three main causes of heavy image file size.
- Size is larger than necessary
- Not compressed or insufficient compression
- File format is not appropriate
Cause 1) Size is larger than necessary
The larger the size (dimensions such as width and height) of an image, the larger its file size. If an image is too large compared to the size actually displayed on the page, the file size to be loaded will naturally be excessive.
For example, this is the case when you use an image downloaded from a stock photo site as is. Adobe Stock, for example, distributes very high quality images, but some of them are over 8000px wide and are clearly too large to be used on a website as is.
In such cases, resize appropriately to reduce the image size. Considering high-resolution displays such as Retina displays, twice the size of the actual display area is appropriate. (The reason for preparing images at twice the size is explained in this article.)
Cause 2) Not compressed or insufficient compression
Today, everything is high resolution, and image files are therefore larger in size. Nevertheless, the file size required to display an image beautifully on the website is usually smaller than the original.
For example, the resolution typically used for high-quality printing is 300 dpi (300 dots per inch). On the other hand, the resolution on a website is usually 72 dpi, and for higher resolutions such as Retina displays, twice as much, 144 dpi, is sufficient. Reduce file size with moderate compression.
Design tools such as Figma allow you to select the image quality when exporting images (JPG). In most cases, an image quality of 80% will allow for compression without adversely affecting the appearance of the image. As for the file size after compression, compression with Squoosh (described below) is more effective in reducing the file size. Therefore, when exporting a JPG image from a design tool, it may be best to export it once as a PNG (to avoid deterioration due to lossy compression) and compress it while converting it to a JPG with Squoosh.
Cause 3) File format is not appropriate
Images stored as digital data come in a variety of file formats, including JPG, PNG, and SVG. Since each file format has different strengths and weaknesses, different file formats can result in significant differences in file size, even if the images look the same. Therefore, choose the appropriate file format for each image. The following article explains in detail how to choose the best image file format.
How to optimize images by Squoosh
Squoosh is the image compression tool developed by Google and runs on the web, so it can be easily used by anyone without the need for installation. The ability to make adjustments while comparing previews of before and after image editing in real time is very useful.
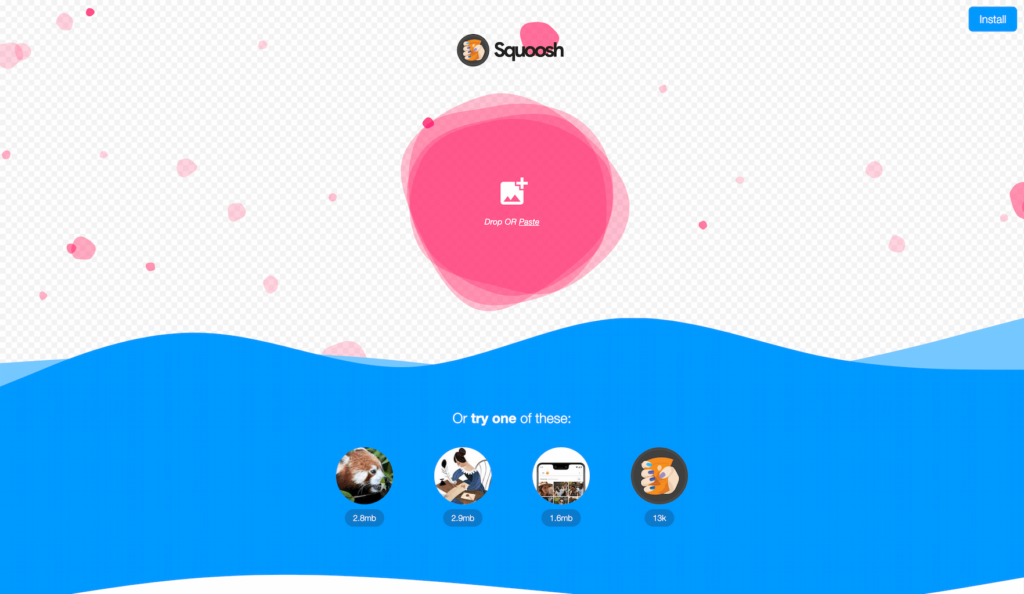
When you access Squoosh, you will first see a page like the one below. Drag and drop the image you want to compress, or click the middle button to select the file.
When the image you want to edit is imported, it will appear as shown below.
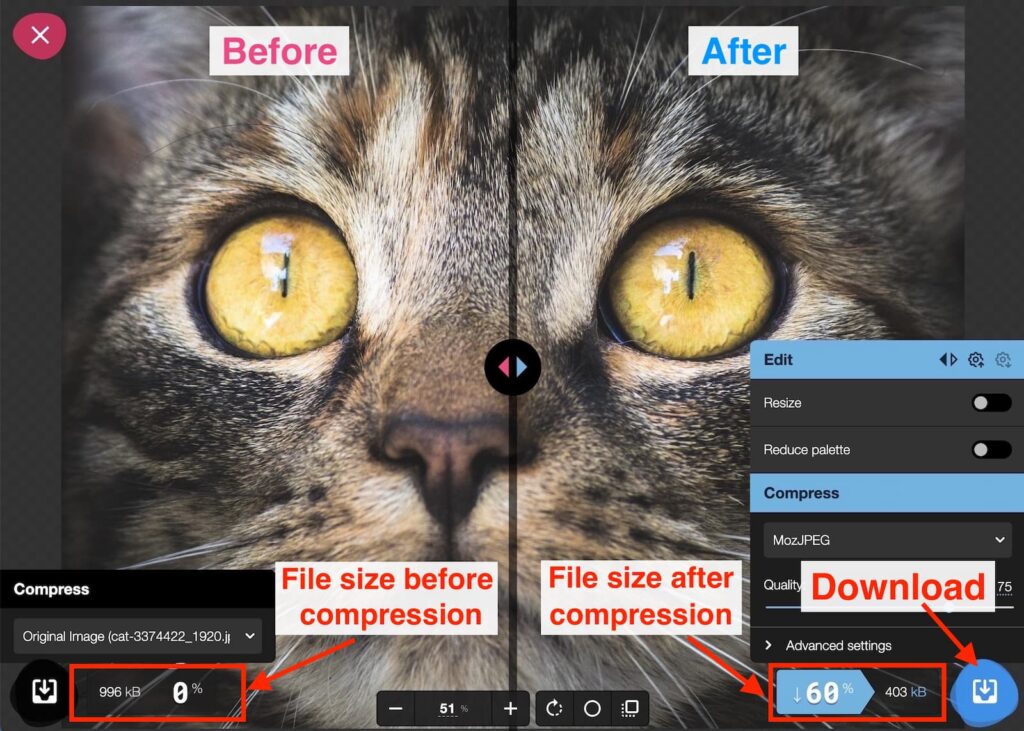
The image before editing is displayed on the left side of the center bar, and the image after editing is displayed on the right side. This center bar can be freely moved by dragging, and the size of each display area can be adjusted. The file size after editing and the file size reduction percentage are shown in the lower right corner. In the example above, you can see that the file size has been reduced by 60%, even though there is little difference in appearance before and after compression. Click the button at the lower right to download the image after editing.
File format conversion
By clicking on the element labeled MozJPEG by default, you can select the file format to be converted.
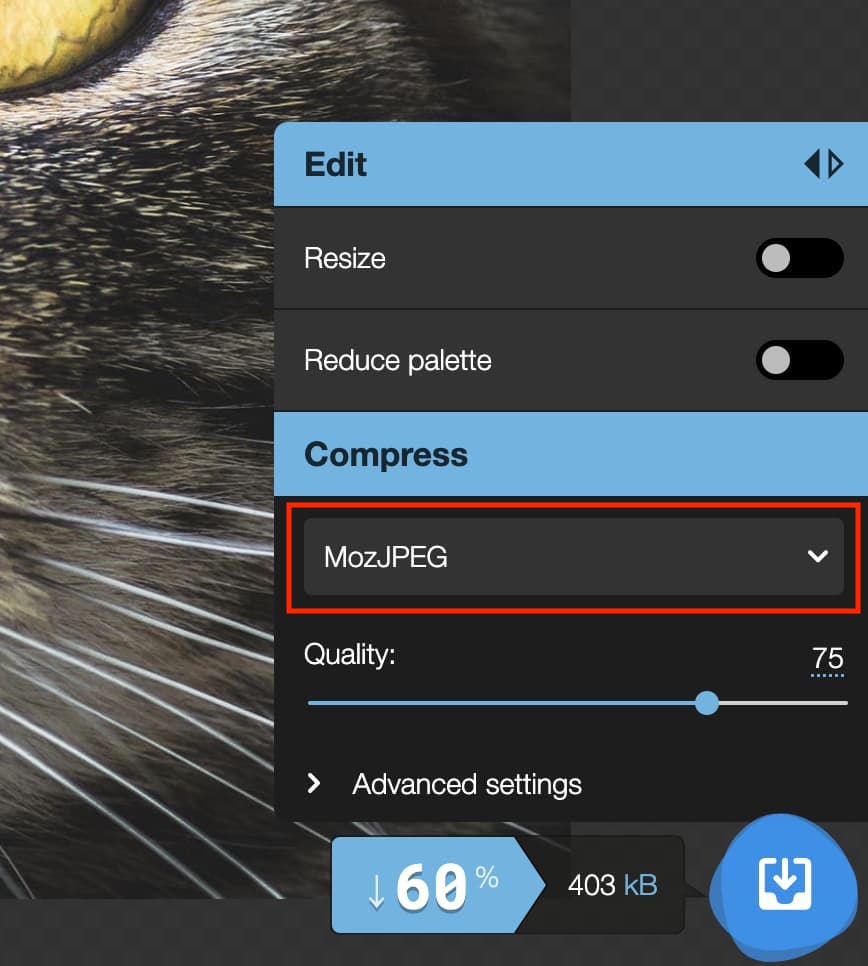
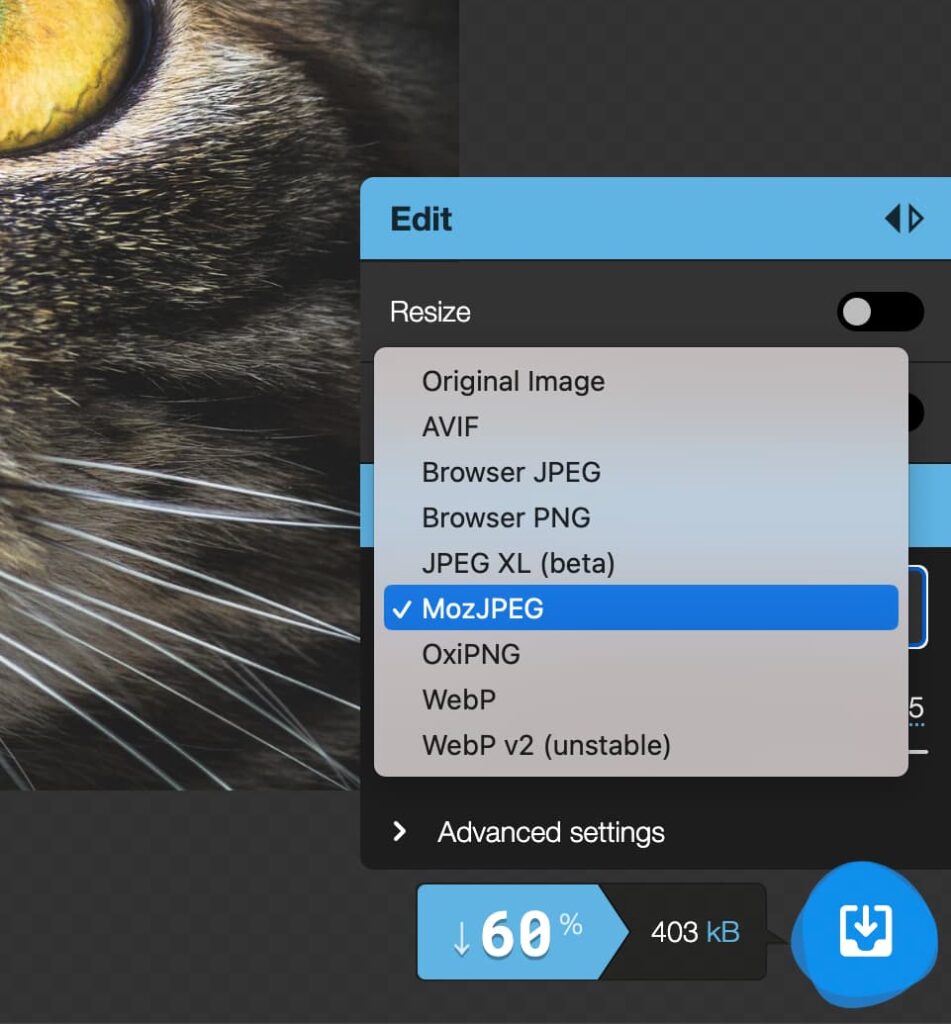
MozJPEG offers better compression than BrowserJPEG, and OxiPNG offers better compression than BrowserPNG. Therefore, we recommend using MozJPEG for JPEG format and OxiPNG for PNG format.
WebP is a kind of next-generation image format developed by Google. It is a very lightweight file format with high-quality compression like JPG and transparency support like PNG. However, older browsers do not support WebP, so it may be necessary to take measures against unsupported browsers by using <picture> tag or other means.
Resize
You can resize the image by turning on Resize option.
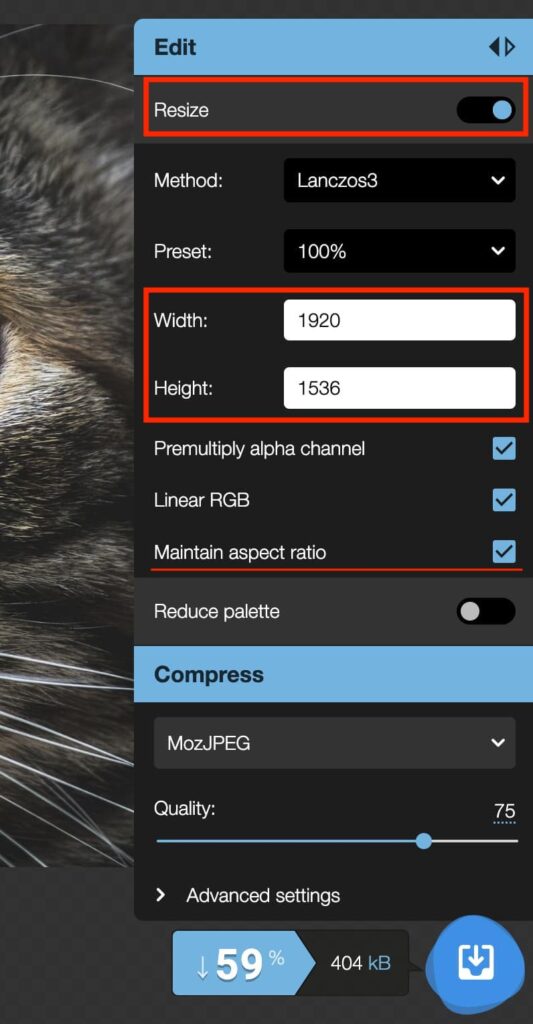
Input the number of pixels for the width or height after resizing in the Width or Height input boxes, respectively. Maintain aspect ratio is an option that determines whether or not the aspect ratio of the image is maintained. If this is checked, the Height will be automatically converted based on the aspect ratio when the Width is changed, and the Width will be automatically converted based on the aspect ratio when the Height is changed.
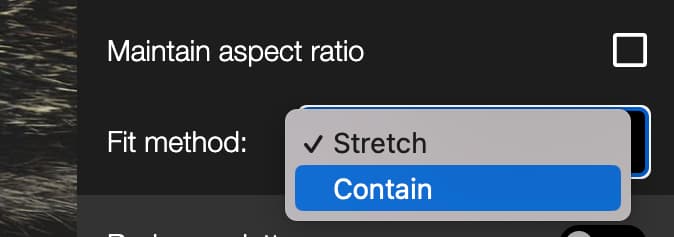
If you want to input both the width and height of the image in absolute values, uncheck Maintain aspect ratio. The options in the Fit method have the following differences.
- Stretch: The image stretches or shrinks according to the inputed Width and Height
- Contain: Crop the image to the inputed Width and Height
Compression (for JPG)
You can adjust the image quality after compression in the Quality bar in the Compress area. (Not available for PNG).
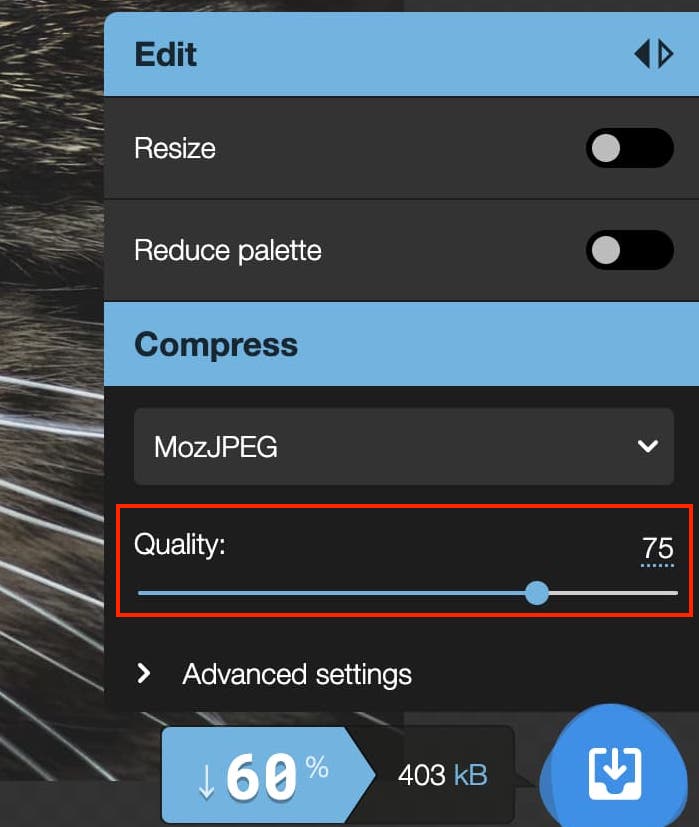
While comparing the images before and after compression, specify the image quality within a range that does not adversely affect the appearance. The default quality of 75% is enough in many cases, but if you are not satisfied with the preview quality, you may want to gradually increase the quality.
When PNG format is selected, the compression ratio cannot be changed. Two options are shown instead, Interlace and Effort.
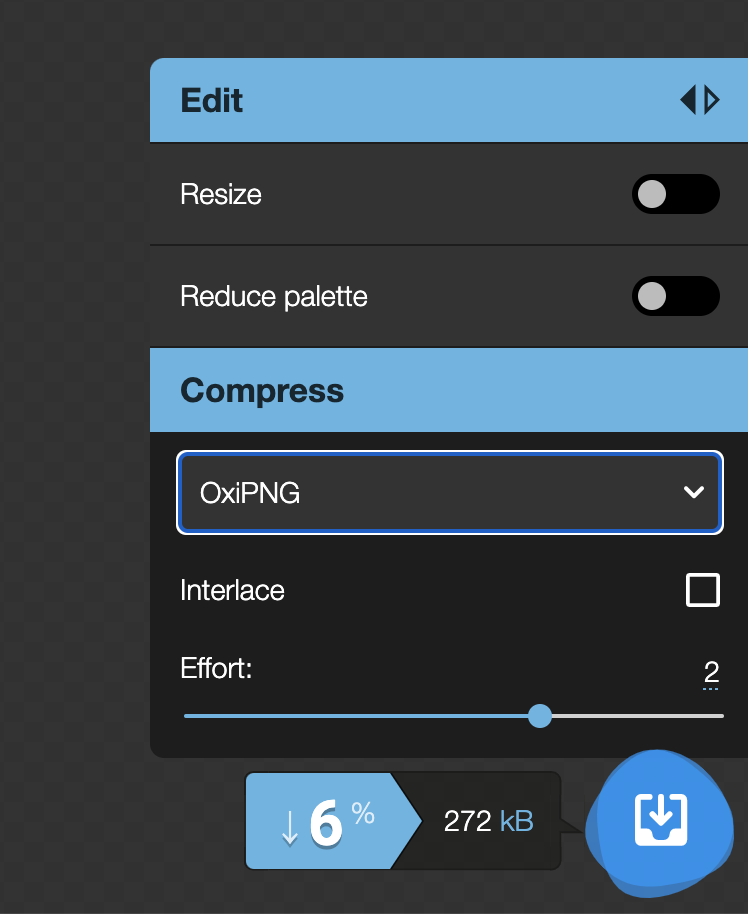
- Interlace: Refers to how images are rendered while being loaded on websites. Normally, images are drawn gradually from the top, but when interlace is turned on, the entire image is first displayed in rough quality, and then gradually drawn more clearly. Although the file size is slightly larger in the interlaced format, the advantage is that the drawing time is perceived to be shorter.
- Effort: A number indicating the quality level of the conversion. The higher the number, the higher quality conversion is expected, but the longer the conversion will take. In most cases, changing the value will have little effect on the file size, so you may leave it at the default setting.
Color reduction (for PNG)
As mentioned above, PNG format does not allow compression ratio changes, so if you want to reduce file size of an PNG image, you can use color reduction instead. Color reduction can be operated with Reduce palette setting area.

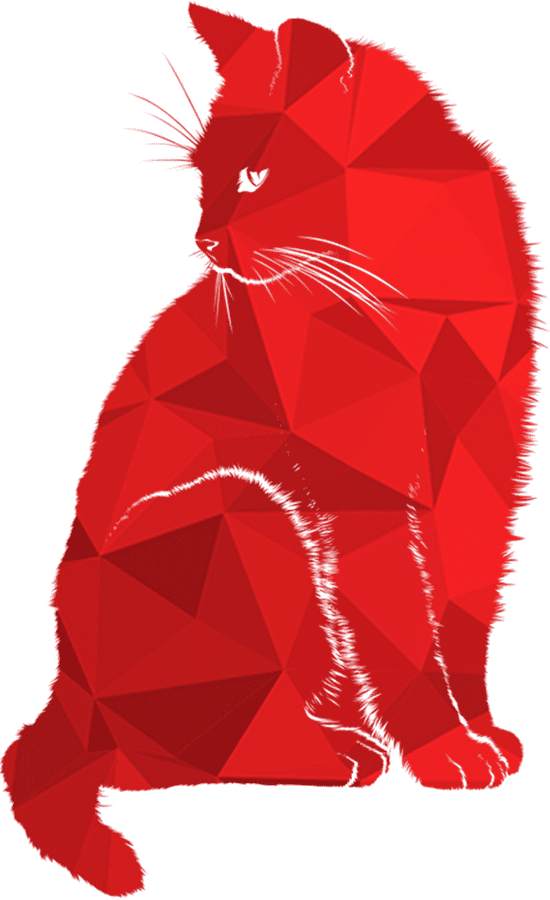
When Reduce palette is turned on, the number of colors in the image will be 256. In this case, if the original image has more than 256 colors, a file size reduction can be expected. In the example image above, the file size was reduced from 289kB to 101kB.
If an image has a small number of colors, even 256 colors may be too many. In such cases, further color reduction can be expected to reduce file size without losing the appearance.
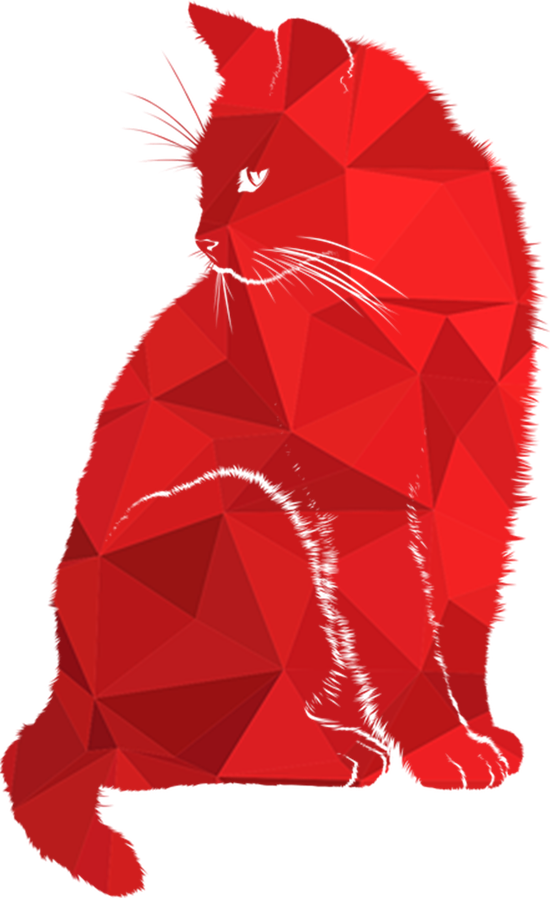
In the example above, the original file size was 260 kB, but after reducing the number of colors to 25, the file size was reduced to 58 kB.
In the Reduce palette section, Dithering can be also set. Dithering is an image processing that reduces the number of colors in an image but makes it appear similar to the original image to the human eye. Dithering smoothes out color boundaries that would otherwise stand out due to color reduction by regularly arranging pixels of different colors to represent intermediate colors. By reducing the Dithering value in combination with color reduction, further file size reduction can be expected, but the color gradations may become visibly rougher. Therefore, it is recommended that Dithering values be reduced only for images that do not have much color gradation.
Although the color reduction described above can be done with JPG, images with a large number of colors suitable for JPG are likely to be adversely affected in appearance by color reduction. For JPG, basically only compression by changing Quality is sufficient.
Conclusion
Reducing image file size is very effective in improving website display speed. Reduce image file size by taking the following three measures.
- Resize images to appropriate size
- Use appropriate file formats
- Reduce file size through compression and color reduction
Squoosh is a very useful image compression tool, give it a try.